
Cloud Rendering & Creativity: Scaling Art with Houdini & GridMarkets by A. Kirichenko
- Sep 29, 2025
- 16 min read
Updated: Dec 16, 2025
Artist interview

Aleksandr Kirichenko is a Houdini generalist specializing in full CG shots. Skilled in 3D modeling, simulations, animation, and rendering. He combines technical expertise with artistic creativity. Since 2016, he has pursued self-driven study across CG productions, contributing to personal, community, and open-source projects. Explore his artwork, GitHub, and complete portfolio at faitel.tech
Short Film: https://youtu.be/RDvAV7T5VZo
Breakdown/Reel: https://youtu.be/Wc6GxdhzWc0
Explore an in-depth breakdown and insights into his short film strive.faitel.tech
We’d love to hear about your studies and how your career began.
After completing my university studies and earning a specialist’s degree in Information Technology, I spent some time working entrepreneurially as an apprentice system administrator and web designer. That experience led me to realize I want to create finished, self-contained products with a limited support cycle, the opposite of what I’d been doing most of the time, where building a system is only the first step and implies long-term maintenance. At the same time, I enjoyed working with a wide variety of clients, and web design combines both creative and technical sides.
How did you end up moving from your previous work into art?
At some point, I decided to pause and try things that had always felt basically out of my reach, among other things drawing and music. I had some familiarity with music thanks to several years of music school as a child, whereas drawing became a true discovery for me. At first, I didn’t even consider drawing on a computer. I was seriously interested in how to draw a straight line or a circle. I liked what Stan Prokopenko teaches on his Proko channel, but at that time my skill level was nowhere near being able to follow along.
In the beginning, I worried about very basic things: how to sit properly, how to hold a pencil, which part of the arm to draw with.
After dozens of sheets, I moved on to perspective and simple forms. That was a very important moment. I rediscovered spatial thinking. Before that, I thought more in symbols. I was interested in programming languages, mathematics, writing poetry, and reading. I used spatial thinking mainly to memorize a city layout or factory diagrams. In my creative work, it was almost absent. As soon as I began learning to imagine the world around me as spatial forms and physical phenomena, I lit up with interest in both drawing and physics more broadly.
What led you from traditional drawing to exploring digital art and storytelling?
Despite that, the more I drew objects and drafted them in perspective on paper, the more often a standard engineering question came up: how can I automate this and speed up revisions? The answer was a drawing on a computer. I sold my Xbox 360 and bought a Wacom Pen and Touch Small, which still works and has long since replaced my computer mouse. Drawing let me look at Adobe Photoshop, so familiar from web design, in a completely new way. I rediscovered it as an artist’s tool thanks to lessons from CtrlPaint.com. I studied with it and with the books "How to Draw" and "How to Render" by Scott Robertson (Author, Editor) and Thomas Bertling (Author), which I learned about through the CG Drawing overview on Vitaly Ivlev’s YouTube channel.
Around the same time, thanks to YouTube and a lecture by the popular artist Jama Jurabaev, I learned about the concept artist profession. I was deeply impressed by the book Framed Ink on visual storytelling that he recommended. For the first time, I seriously asked myself: what am I actually drawing, what do I want to say and convey to the viewer? Those questions led me to step away from drawing for a while and read books about screenwriting, myth-making, acting, choreography, and cinema as a storytelling language. Back then, I came up with and wrote down about two dozen short stories and short-film scenarios. Bringing them to life remains my goal to this day.
Can you tell us how you began exploring 3D and Houdini?
The desire to tell stories raised another question: how can I depict worlds and characters so they can be viewed from different angles? That led me to 3D. I started with ZBrush for sculpting because it’s the closest experience to drawing, and I was thrilled to be able to work with forms in three-dimensional space. On the technical side, Michael Pavlovich’s videos helped me a lot. I tried to model a dragonfly using Eric Keller’s ZBrush tutorial for Gnomon, but when I got to the wings, they were so complex that I got stuck for a long time, realizing that not everything I can do with sculpting, and I was missing skills in classical 3D modeling.


From that moment, I began trying all the modeling packages available to me: Cinema 4D, 3ds Max, Maya.
Honestly, I liked each of them in its own way, but by then I had grown tired of repeating the same things for weeks, twelve hours a day. I was looking for tools that would let me solve problems with thought rather than brute force. Then I saw a presentation by Fianna Wong on Vimeo and learned that you can model in Houdini, not just create effects. I was also impressed by Anastasia Opara’s talk showing how programming can be used to procedurally model very non-trivial objects. It appealed to me to look at objects and the world, up to a point, as a set of mathematical patterns, so I dove headfirst into Houdini, and I’ve been working in it ever since.
What have you learned over the years using Houdini?
Over six years of using Houdini, I’ve come to see that the developers start from the foundations and gradually build up to high‑level tools. But at the very beginning, I really missed user-friendly tools. On the one hand, I was forced to understand how everything works at the level of points and polygons in Houdini, and to strengthen my technical knowledge of GPUs, shading, and rendering—mostly from sparse documentation and online articles, with almost no video tutorials. On the other hand, the Modeler for Houdini plugin helped me a lot by bringing artist‑friendly classic modeling tools into Houdini. With it, I could model like in other packages, but when I felt I needed a procedural approach, I could solve it with Houdini’s standard means right on the spot, where in other packages I would likely have needed separate plugins.
Since then, Modeler for Houdini has become even better, and Houdini has grown a body of documentation, many tutorials, and high‑level artist‑friendly tools that ease routine tasks. It’s still a huge volume of knowledge and skill needed to create an animated film, but for me, Houdini is about scalability and freedom: I always start with a series of small experiments and then, like bricks, assemble them into one large project.
What advice would you tell someone who’s just starting their journey?
For beginners who want to take the generalist path in Houdini, today I’d recommend paying attention to these courses and tutorial series:
I’d also recommend buying the Modeler for Houdini and ODTools plugins: the first will connect you to a modeling workflow on par with other popular 3D packages, and the second is a “Swiss Army knife” of utilities you quickly get used to—they speed up working with nodes and the interface, as well as sorting and importing assets/models into Houdini. Houdini doesn’t require many plugins, and these have proven themselves over time and by functionality. For more advanced tasks, Axiom Solver to accelerate pyro simulations and MOPs for procedural animation.
Can you tell us about your firsts completed 3D projects?
I consider my first finished 3D work to be a Push Dagger model. Making it, I tested many different packages and modeling styles: CAD, sculpting, and Boolean modeling. But I achieved the final result through classic subdivision modeling.


After that, I took on a motorcycle model because I really like them, but modeling more than 300 parts turned out to be a non‑trivial task. I rebuilt the project many times and made other smaller models just to confirm or disprove certain hypotheses and find a balance in how to represent all the parts hierarchically, switch between them comfortably, and maintain high performance. The result was something in between from many experiments: I use different approaches depending on the specific model and its complexity. At times, I wanted a definitive solution to all problems, but in practice, there’s only constant adaptation and choosing among several modeling and project‑structuring patterns.


Can you share the story behind your animated short, “Strive”?

My most recent work to date is the animated short “Strive.” It’s brief in length, but I’m proud of those two scenes. The film’s core message is that justice, rather than vigilantism, keeps guilt and punishment in check, whereas acting as a vigilante only brings more chaos and harm to others. Sometimes that can be counterintuitive, since justice rarely arrives instantly, and the long-term consequences of taking the law into your own hands are anything but clear. The intro conveys the philosophical meaning, and the action scene that follows let me consolidate past skills in both classical and procedural modeling, pyro, RBD, and Vellum simulations, and also develop new skills in rigging, animation, and FLIP simulations.
The last ones were particularly challenging: rigging and animation in APEX were in beta at the time, and—as with modeling earlier—I had to figure things out with only a small amount of material available. When rigging the motorcycle, I adapted tutorials from other programs to Houdini.


The puddle simulation became an interesting challenge in two respects.
First—simulating water over pavement. The difficulty was that I had created the cobblestones from a texture in a MaterialX shader with procedural noise, but I needed the same road model at the geometry level for water collisions. I solved this by recreating the shader at the geometry level: I used an OpenCL SOP Wrangle and connected the noise library from MaterialX for OpenCL, which lives in the Houdini installation folder and which you won’t discover from Houdini’s interface; that’s why you should check the Houdini Installation folder: \houdini\ocl\include\mtlx_noise.h


The second aspect was simulating secondary ripples on top of the FLIP simulation. The FLIP solver gave good, large waves and splashes from the motorcycle and blast wave as a starting point, but the resulting geometry lacked detail and finer ripple patterns on the water. For that, I used a Ripple Solver, to which I fed the animated puddle geometry and got secondary ripples. This simulation was difficult to control, so I used procedural modeling tools and blend shapes to deform and adjust the animated geometry to make the result look realistic.
In general, procedural modeling often helps “repair” complex simulations and avoid re‑simulating. For example, after simulating the explosion and smoke, I noticed a small smoke collision with the arch and a little vortex in the explosion, whose color and shape I didn’t like. I simply animated a Lattice for Volumes deformer to “flatten” both areas with respect to how it looked in camera.
While creating the key scene in Strive—which consists of a city environment, animated trees, a large explosion, barriers reacting to shockwave, a motorcycle with a character, and puddles he rides through - I learned an important lesson: always be optimizing. It’s hard to learn without experience.
When a project is large and you don’t know how much time and effort it will take, it’s tempting to leave everything as is or try to optimize in the wrong places. The price of not optimizing is creative freedom. You could spend longer on animation, but the rig “lagged”; you could choose a better angle, but the explosion and number of models made the viewport barely responsive, and so on. In creative work, the number of iterations per unit of time directly affects quality.
How does hardware impact your Houdini work?
Creating an animated video relies not only on software but also on hardware.
When you work in Houdini or in compositing programs, two types of tasks require a thoughtful approach to hardware selection and use.
Previsualization and sketching:
The first type is previsualization and sketching, the stages where you establish the basic form of the scene, models, simulations, and lighting. At this stage, raw power, memory capacity, and disk space are key. You should aim for the viewport to run with proxy models and low parameter settings at roughly your target frames per second. This ensures fast iteration and creative decision-making.
Offloading intermediate/heavy computations to a remote workstation:
When you buy Houdini Indie, you get two licenses. You can use this to create an additional workstation to offload intermediate tasks. The advantage is that you can have an almost complete clone of your main machine with all plugins and settings synchronized via a cloud service or a local NAS or Nextcloud server. All you need is to save the project, open a remote desktop app, launch Houdini, and the task will start running. I use the free NoMachine, where you can disable all image compression settings, and with a good internet connection, working on a remote machine is very comfortable. NoMachine works as a local server without third-party middle servers, but I also installed AnyDesk as a fallback in case the first fails. You can assign any intermediate tasks to this machine: if you need to run a simulation for an hour or two, run it on the remote machine and keep working on your PC. I use a laptop as my main computer, so for me the remote workstation is also the place for final optimization and caching, because it has more disk space and runs 24/7 with a stable connection. In theory, you can build a universal workstation, but its cost will grow rapidly while the gain in raw performance declines. Plus, I feel much calmer knowing that if anything happens to my laptop, I have data copies not only in the cloud, but also on a remote machine I can connect to from any device and continue working.
What hardware limitations have you faced?
With a mobile‑plus‑remote workstation setup, you can go quite far, but I quickly ran into a lack of resources for the most common reason today—not enough VRAM. My remote workstation has two Nvidia 70‑series GPUs with 8 GB of VRAM, which is catastrophically insufficient for rendering a scene with many textures and simulations. This is compounded by the fact that rendering 4K frames across multiple compositing layers consumes large amounts of VRAM by itself.
What do you find is the biggest bottleneck in your work, and how does your hardware handle it?
At that point, you face a choice: either buy more hardware or rent it.
When you are short on VRAM, the first thought is to get a 90-series GPU or higher. Its price is 2 to 3 times that of a 70-series card and well over $1,500. It is a good investment overall, but how far does it scale? I rented a machine with several 90-series GPUs and realized not everything comes down to raw power and VRAM.
My scene, even after optimization and caching, took 7 to 10 minutes just to load into memory before the first frame. Rendering was fast after that, but still several minutes per frame. If I did not restart the render after a dozen or two 4K frames, the main GPU’s VRAM would fill up, and I had to restart the render again, waiting another 7 to 10 minutes for the scene to load. Before geometry and texture optimization, the scene occupied 22 to 23 GB of VRAM. After optimization, it occupied 14 to 16 GB, not including the 4K frames themselves, which during rendering will occupy gigabytes of VRAM.
This lets me render the scene, but definitely not all 240 frames in a single batch!
In principle, if you have invested in a 90-series GPU and are willing to let the workstation render for a couple of days, that is a reasonable solution. I had a choice: rent a machine for 1 to 2 days at around $500 to $700 or buy a GPU for several thousand.
Spoiler: I solved it for $80 using GridMarkets, rendering 240 heavy 4K frames in one day, with near-per-dollar control over costs, plus about a dozen test frames.
How did you approach distributed rendering in Houdini?
Back at university, my interests and a course paper focused on cluster computing, when dozens of computers perform calculations and return results to a main computer. SideFX even offers tools for building distributed systems like HQueue. The problem is that building such systems yourself is expensive, requires maintenance, and also calls for additional Houdini licenses. There are intermediate solutions when you use, for example, Amazon infrastructure via their Deadline solution, but that still requires sysadmin skills and likely the purchase or rental of licenses.
GridMarkets, by contrast, takes a similar distributed computing system, packages it into a black box, and gives it to any Houdini user. You send data to render right from the project, monitor virtual machines via a web interface, and new data automatically returns to your computer. You don’t need to worry about licenses, operating systems, or disk space. You simply choose the maximum number and type of machines, and from one to several hundred machines start working in parallel in the cloud. All you need is to install the GridMarkets Envoy app, add the GridMarkets render HDA to your project, and top up your balance via the web interface.
How do you manage caches with GridMarkets?
Speaking of the balance, an advantage is that there is no charge for uploading big caches, even 150 GB and above. The optimized render cache for my project weighed 120–150 GB, and I twice completely deleted it and uploaded it again on my own initiative because I was experimenting with cache structure and storage. On the GridMarkets side, I didn’t see any signs of restrictions. Moreover, if you uploaded something once within a project, GridMarkets won’t upload it a second time, provided the files are identical—the service will only upload new files. It’s also nice that the remote storage “emulates” the same file paths as on the computer from which the data was sent—this reduces the risk of path problems in shaders and at the node level in general. The main thing is: if some file lies outside the project folder, make sure it is actually uploaded to the service.
Can you describe your workflow with GridMarkets?
A simplified rendering workflow with GridMarkets looks like this:
Install the GridMarkets Envoy application, which sets up a service with a web server in your system for uploading and downloading files. In the web interface, in the Plugins section, install the Houdini nodes you’ll use to submit renders.
Open your project and add a GridMarkets Submit LOP after Render Settings LOP. In many ways, it’s a wrapper around USD Render LOP, but with additional parameters for submitting jobs to GridMarkets.

Click Submit Job and you’ll see perhaps the most important window in the whole workflow: the Preflight panel. It shows the list of files that will be uploaded to the server, as well as GridMarkets settings, such as how many frames to render, how many machines to start, and of what type.
Always verify that everything needed for each frame is going to the cloud; if not, add it manually or check your USD tree.
After submission, check in the web interface that everything is in order, first in Downloading—that the files uploaded—and then in Submissions—that a machine of the correct type started. GridMarkets has two machine types, with GPUs (OB prefix) and without (GM prefix). If the wrong machine type starts, don’t hesitate to stop the job so you don’t spend money.

GridMarkets Preflight panel for submission 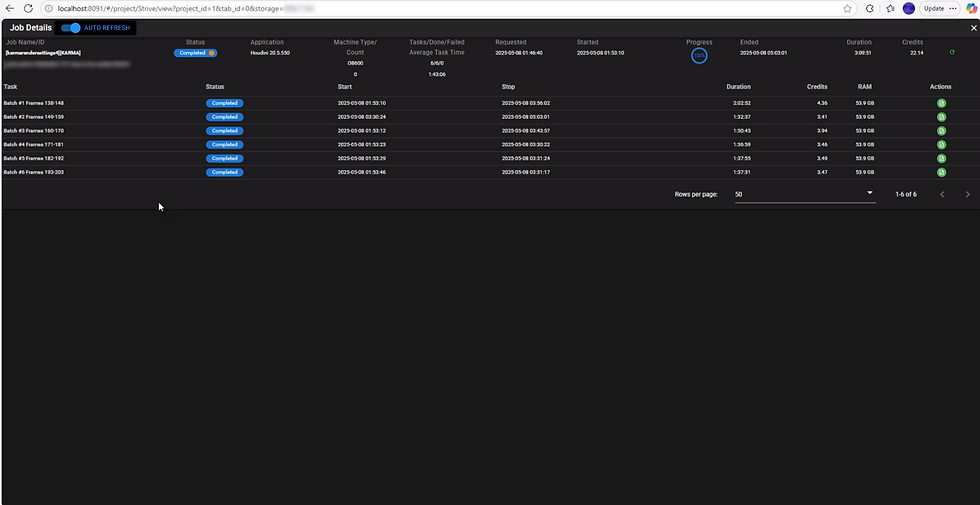
GridMarkets Submission panel Don’t be shy about contacting support, especially early on. At first, they’ll likely point you to relevant docs, but if something is non-standard, they will help. In rare cases when something goes wrong on the server side, support may even be proactive and write to you about an error or try to fix it. Both Houdini and GridMarkets are constantly evolving and updating to stay aligned with the latest or previous production build, so watch for plugin updates in the web interface, and if you’re missing something, talk to support. Your feedback is quite likely to be factored into development.
How do you render USD scenes with HUSK on GridMarkets?
GridMarkets lets you run not only rendering, but also any other tasks in Houdini via ROP and TOP nodes. In this project, I used the LOP node for rendering, so I want to talk a bit more about USD and rendering a scene using HUSK.
When you render in Solaris in Houdini, you are effectively caching the entire scene to disk as a set of USD files, which in turn can reference each other as well as textures, VDB simulations, and other assets. USD Render LOP, after you click Render, launches the headless console utility HUSK, which is an independent process of Houdini. It takes render parameters as input, determines the render engine type, and the root USD file of the scene.
When you send a scene to GridMarkets via Submit LOP, the remote machines skip launching Houdini and go straight to launching HUSK. This saves money on startup time and minimizes the risk of discrepancies between cloud rendering and what you see locally.
To further ensure yourself, do a Husk Control → Save to Disk of the USD file, then add a separate Reference LOP and load that file. If the entire scene loads correctly through Reference LOP, then it will most likely be successful in the cloud as well.
Why does rendering scale so well?
What I like is that, unlike simulation and geometry generation, rendering scales almost perfectly and parallelizes very well. If you’ve cached properly or saved attributes for motion blur as a vector attribute for geometry or a velocity field for volumes, you can render frames in any order, on any number of machines running in parallel, and even render frames as tiles separately so you can stitch them back together in compositing for giant resolutions. Each machine renders frames and immediately returns them to disk, so you can monitor quality on your PC while the machines continue working.
Do you have any tips for testing frames before a full render?
Given that, I recommend not only rendering frames in batches (to save resources when loading the first frame into memory) but also using a “bisection” testing method. For checking the scene, render first the first, last, and middle frames. Then every 24th/60th frame, then 12th/30th, and so on until you’re confident there are no errors or artifacts throughout. That way you can avoid early on the errors that might appear at different time segments of the scene. For example, in my scene, you could only tell whether the motion blur on the motorcycle worked in the second half of the frames.
Attention to detail, extra and smart checks at every stage are the key to economy resources.
Do you have any final thoughts on using these tools?
It seems to me that the possibility of telling stories visually has never been more accessible than it is now. Tools like Houdini paired with Modeler for Houdini and GridMarkets, help you go from a sketch to the final render when creating any stories and worlds.
How do you stay inspired and up to date as a digital artist?
I closely follow what representatives of SideFX say in presentations and masterclasses - Cristin Barghiel, Jeff Wagner, Esther Trilsch, as well as Alexey Vanzhula, the developer of Modeler for Houdini. They’re currently pushing the boundaries of what’s possible in Houdini for me, so by their rare comments, I can predict what tools and capabilities will be available to me as an artist over the next year or two. And of course, I check YouTube and LinkedIn—platforms where other artists never cease to amaze with their innovation and creativity.
On the other hand, when your understanding of fundamentals is strong, you don’t need to wait for a tool, an example, or permission to reach your goal: you simply assemble what you need piece by piece, step by step.
When I’m short on inspiration, I either go out of the city into nature or nearby villages or head to the cinema for both animated and live‑action films. I especially love IMAX and 3D. Every time it’s an amusing and inspiring experience.
What are your plans?
As for current and future plans: the focus on character animation in Houdini 21 and the opening of the Metahuman license for rendering outside Unreal Engine finally give me, as a director, the opportunity to bring all my scripts to life, so there’s a lot of work ahead, and I’ve already started experimenting with it. Plus, integration of AI models for upresing simulations, smart denoising, skinning, and asset generation will require building more tied integration between my local setup and GridMarkets in the near future.

By: GridMarkets marketing 2025


https://gamehitclub.it.com/ bữa mình bấm vào xem thử vì thấy bạn bè nhắc, kiểu tò mò xem giao diện với cách họ trình bày nội dung ra sao thôi. Ấn tượng đầu là trang nhìn gọn, chữ nghĩa và các khối thông tin tách bạch nên kéo xuống không bị rối mắt. Mình có lướt qua đoạn giới thiệu lịch sử, thấy họ ghi mốc ra mắt từ 2015 nên cũng dễ hình dung hơn, không phải dạng trang chỉ nhồi hình với nút bấm. Mấy tiêu đề đặt rõ ràng, đang đọc đến đâu là biết mình ở mục nào, chuyển qua lại cũng khá mượt trên điện thoại. Nói chung mình không vào sâu phần game hay gì, chỉ…